Getting Started with the Eucalyptus Management Console
Getting Started with the Eucalyptus Management Console
This section helps you get started using your Eucalyptus cloud with the Eucalyptus Management Console.To access Eucalyptus with the Management Console, you’ll need a password for the Management Console. Talk to your cloud administrator to get your keys and passwords.
1 - Console Login
This screen allows you to log in to the Eucalyptus Management Console with either your Eucalyptus or your Amazon Web Services account. If you’ve forgotten your password, don’t have login credentials, or do not know the URL for the Eucalyptus Management Console for your Eucalyptus account, please contact your system administrator.Navigate to the Eucalyptus Management Console by typing the URL of the Management Console into your browser’s navigation bar. The URL of the Eucalyptus Management Console depends on how the console was installed in your cloud; see your system administrator for the specific URL for your installation. Follow the appropriate instructions below for logging into either your Eucalyptus or your Amazon Web Services cloud.
Log in to your Eucalyptus cloud
This area of the login dialog allows you to log in to your Eucalyptus cloud.Click the Log in to Eucalyptus tab. Type your account name into the Account name text box. Type your user name into the User name text box. Type your password into the Password text box. Click the Log in to Eucalyptus button.
Log in to your Amazon Web Services cloud
This area of the login dialog allows you to log in to your Amazon Web Services cloud.Click the Log in to AWS tab.
Note
To obtain your AWS security credentials, go to Amazon’s page.Enter your AWS access key ID into the Access key ID text box. Enter your AWS secret access key into the Secret access key text box. Click the Log in to AWS button.
2 - Launch and Connect to an Instance with the Management Console
To launch an instance:
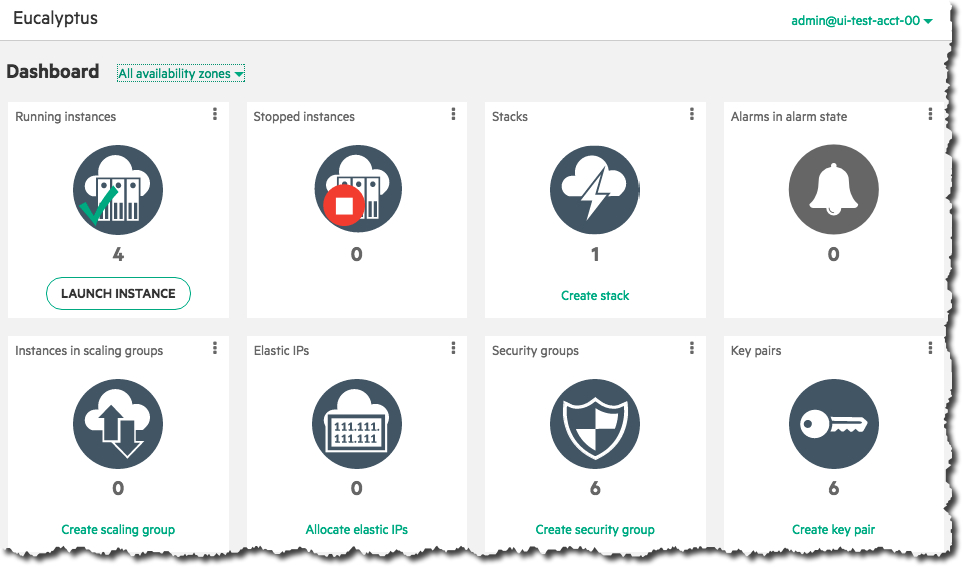
Click on the Launch Instance button on the main console page:
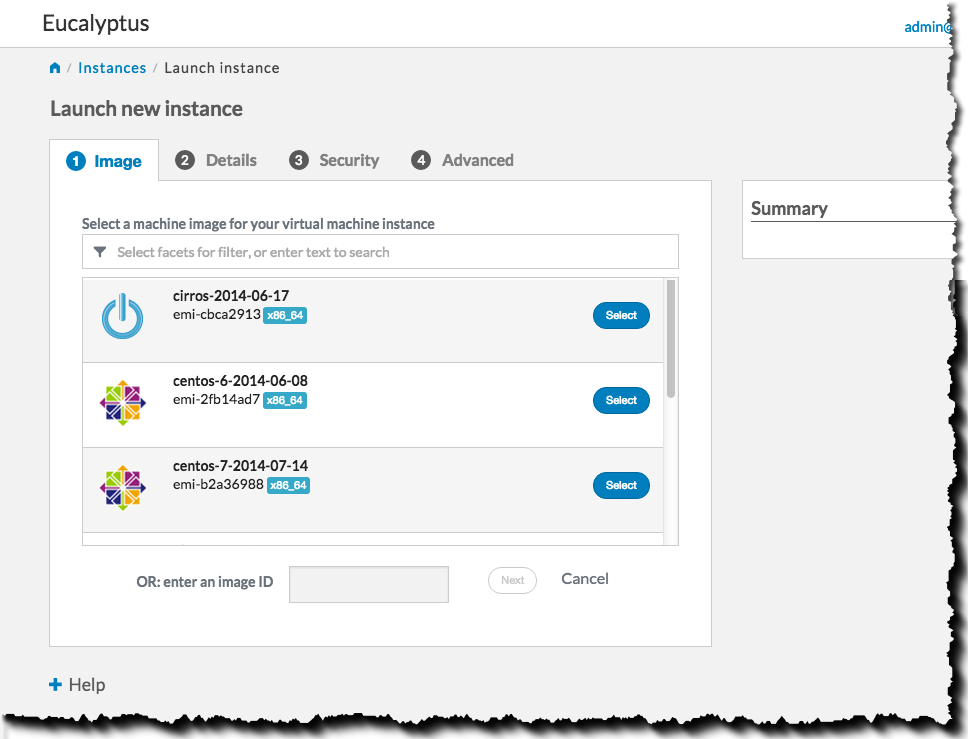
 Select an image from the list (for this example, we’ll select a CentOS image), then click the Next button:
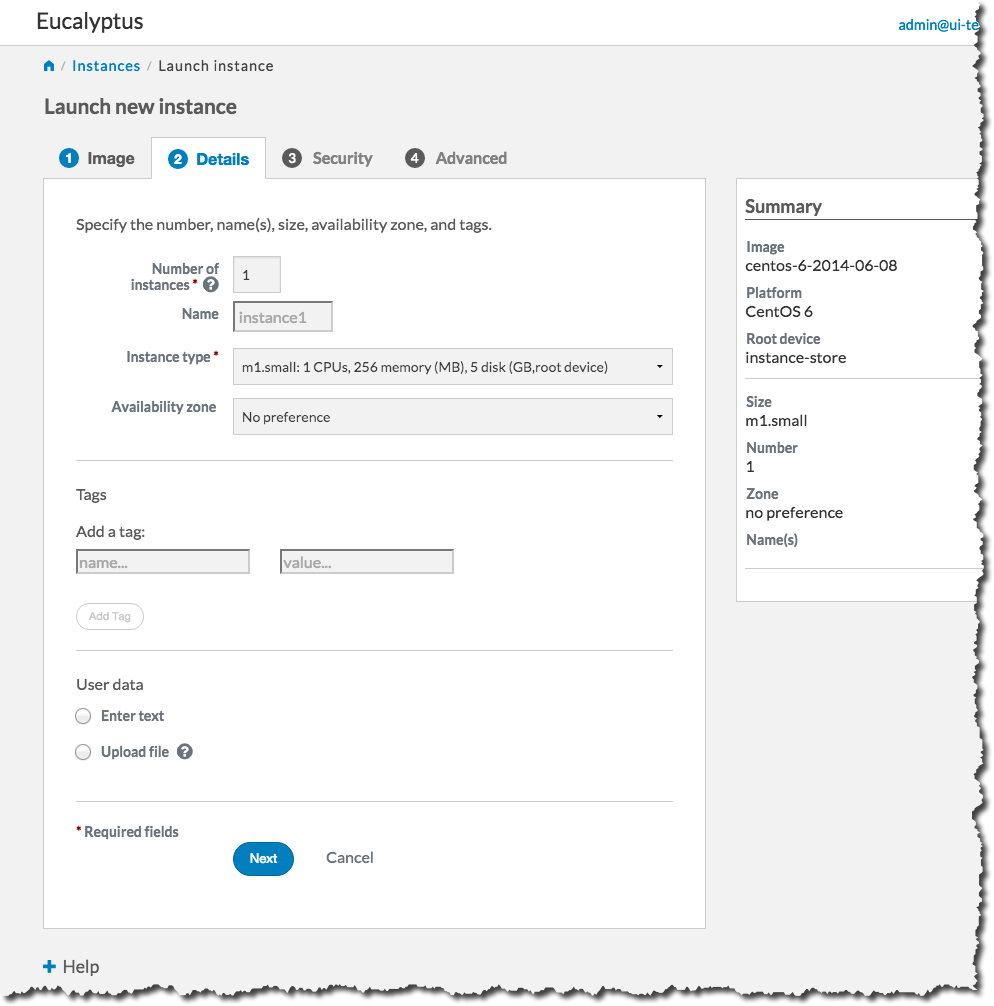
 Select an instance type and availability zone from the Details tab. For this example, select the defaults, and then click the Next button:
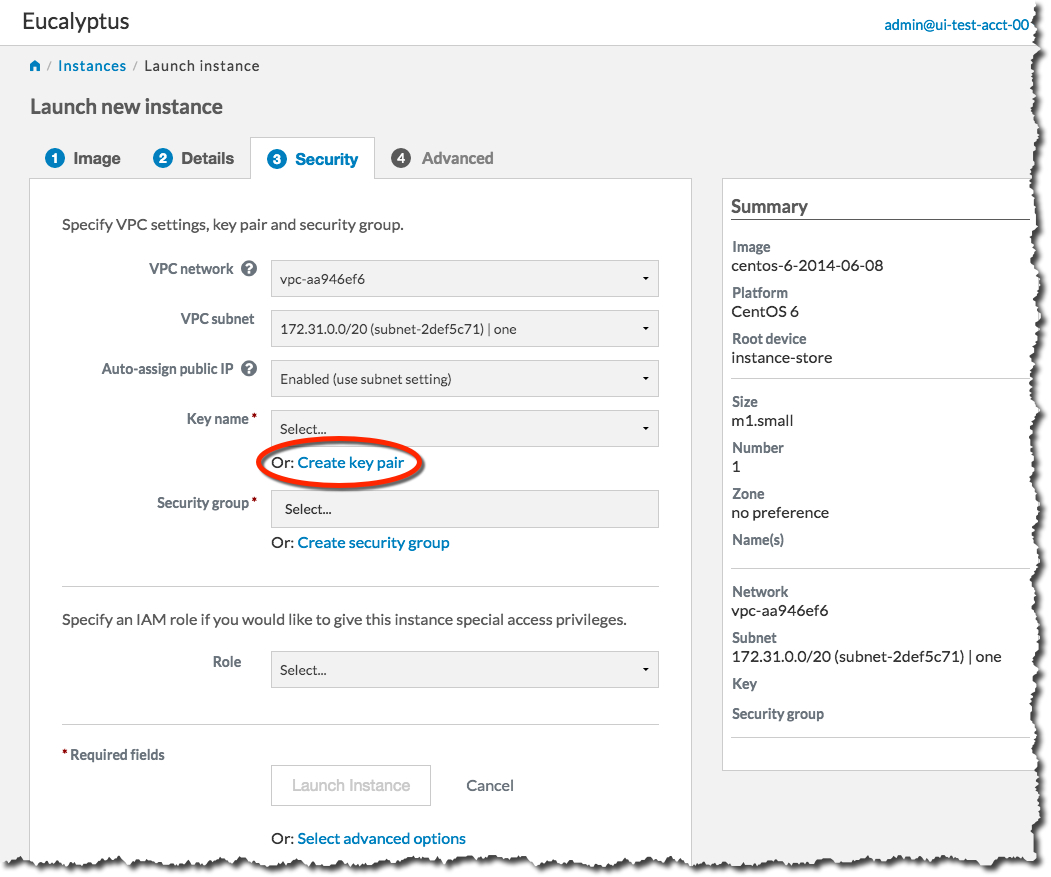
 On the Security tab, we’ll create a key pair and a security group to use with our new instance. A key pair will allow you to access your instance, and a security group allows you to define what kinds of incoming traffic your instance will allow.
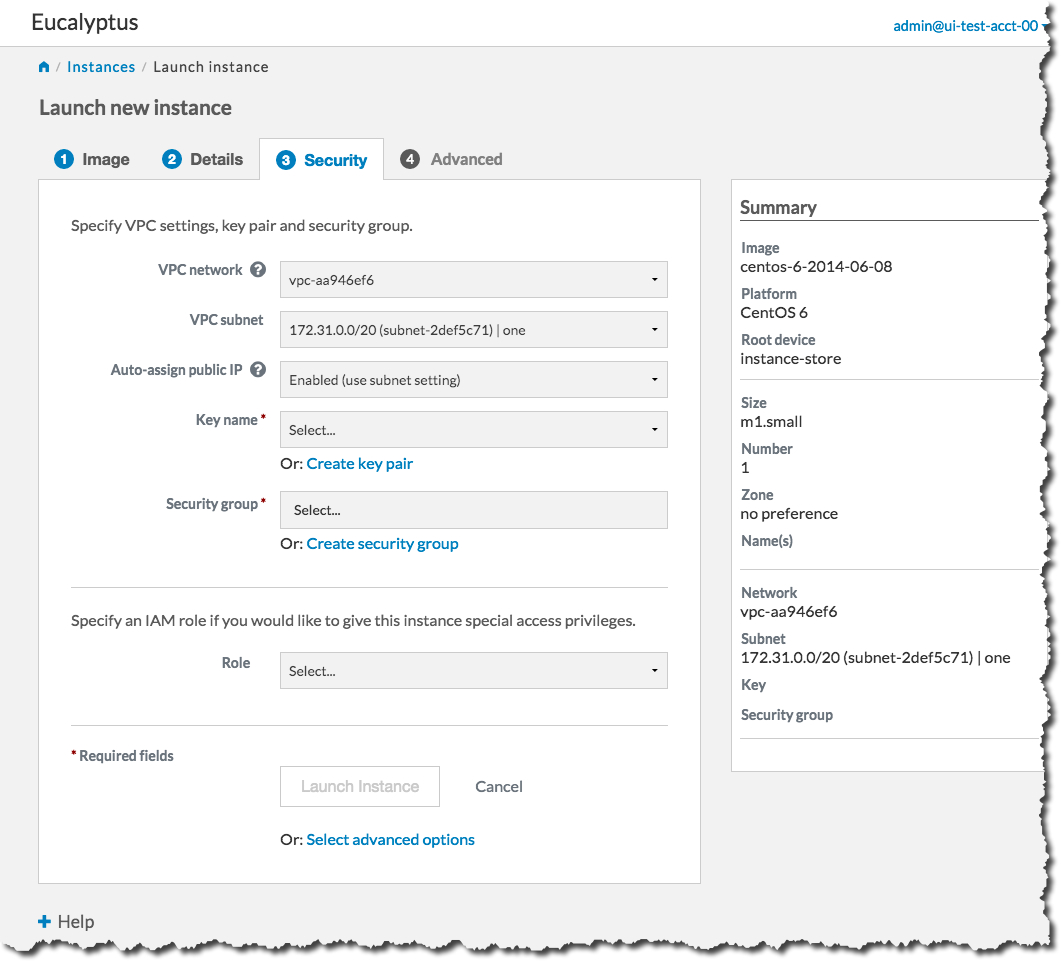 First, we will create a key pair. Click the Create key pair link to bring up the Create key pair dialog:
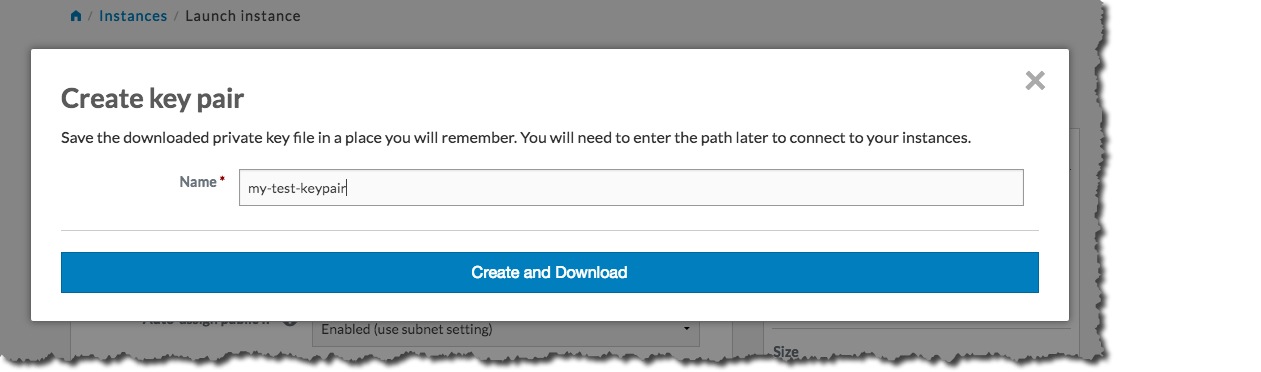
 Type the name of your new key pair into the Name text box, and then click the Create and Download button:
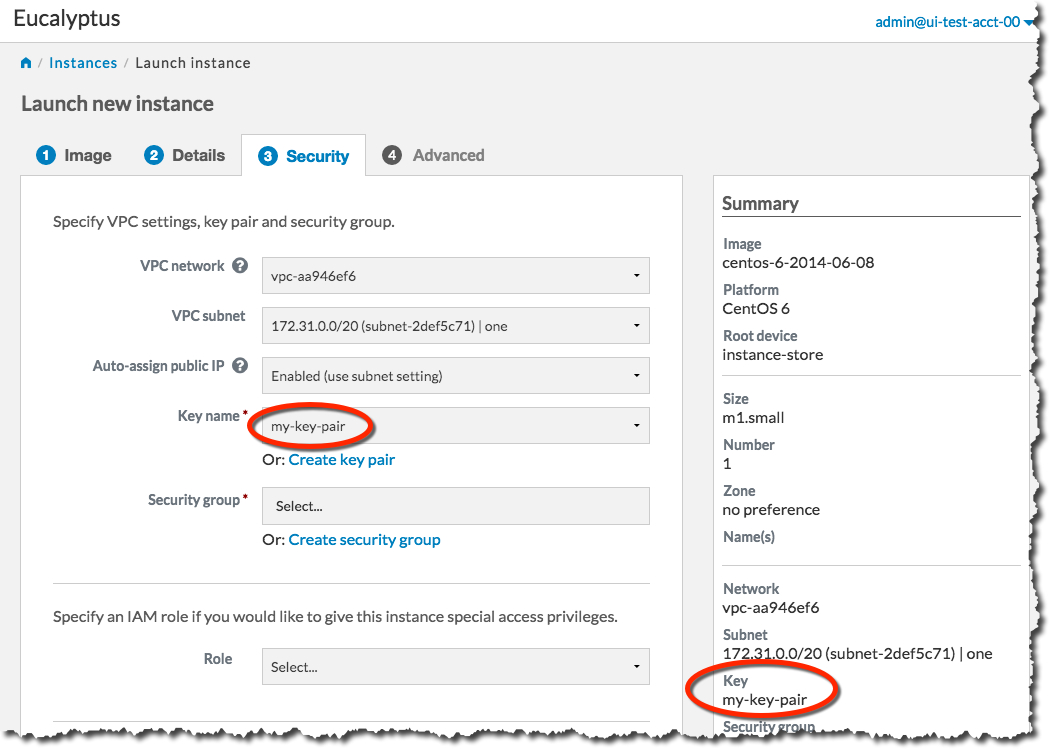
 The key pair automatically downloads to a location on your computer, typically in the Downloads folder. The Create key pair dialog will close, and the Key name text box will be populated with the name of the key pair you just created:
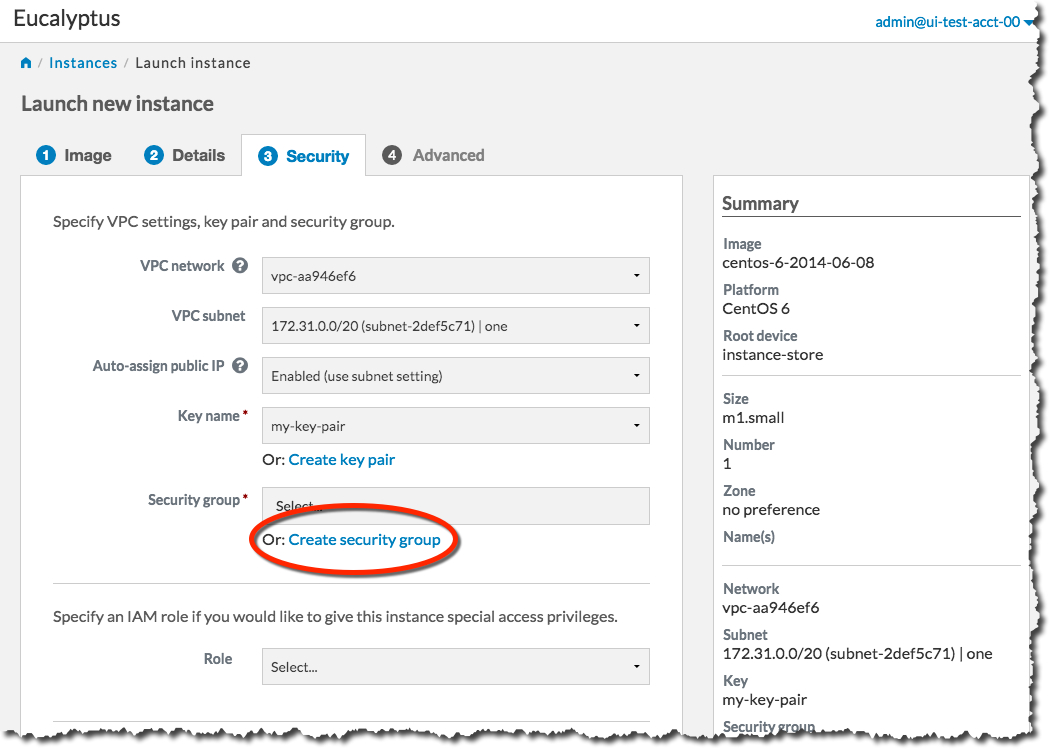
 Next, we will create a security group. Click the Create security group link to bring up the Create security group dialog:
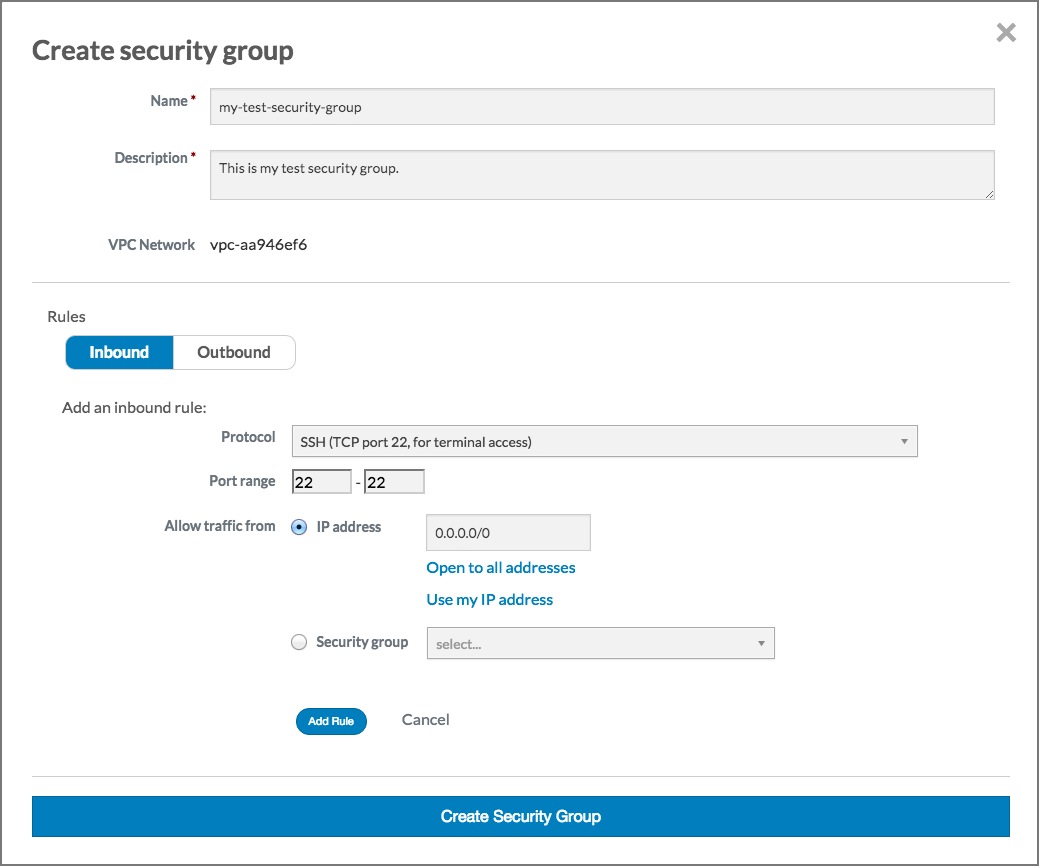
 On the Create security group dialog, type the name of your security group into the Name text box. Type a brief description of your security group into the Description text box. We’ll need to SSH into our instance later, so in the Rules section of the dialog, select the SSH protocol from the Protocol drop-down list box.
Note
In this example, we allow any IP address to access our new instance. For production use, please use appropriate caution when specifying an IP range. For more information on CIDR notation, go to .You need to specify an IP address or a range of IP addresses that can use SSH to access your instance. For this example, click the Open to all addresses link. This will populate the IP Address text box with 0.0.0.0/0, which allows any IP address to access your instance via SSH.
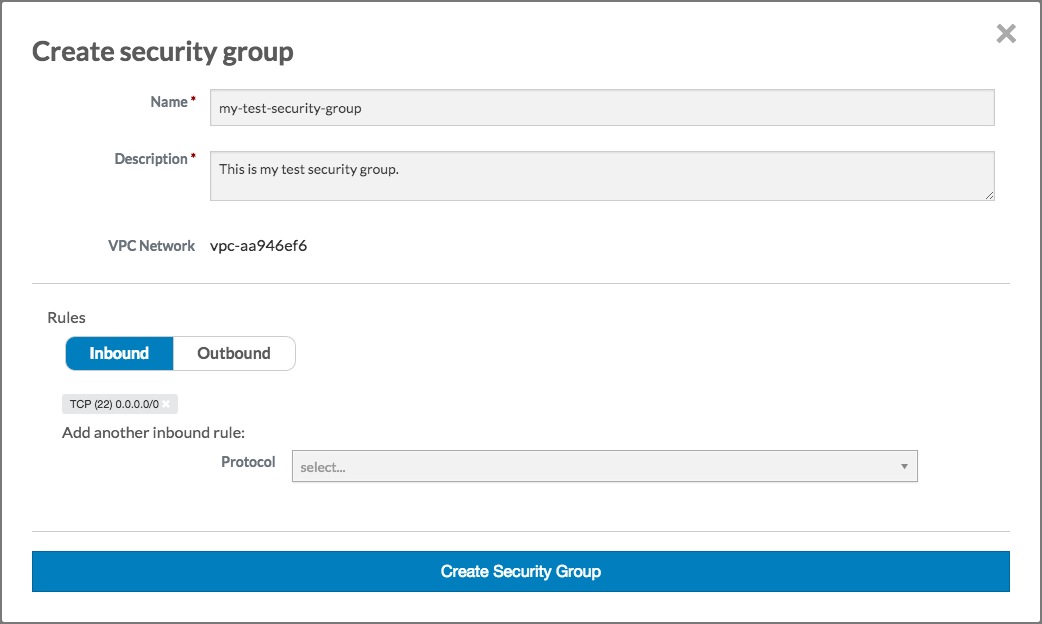
Click the Add rule button. The Create security group dialog should now look something like this:
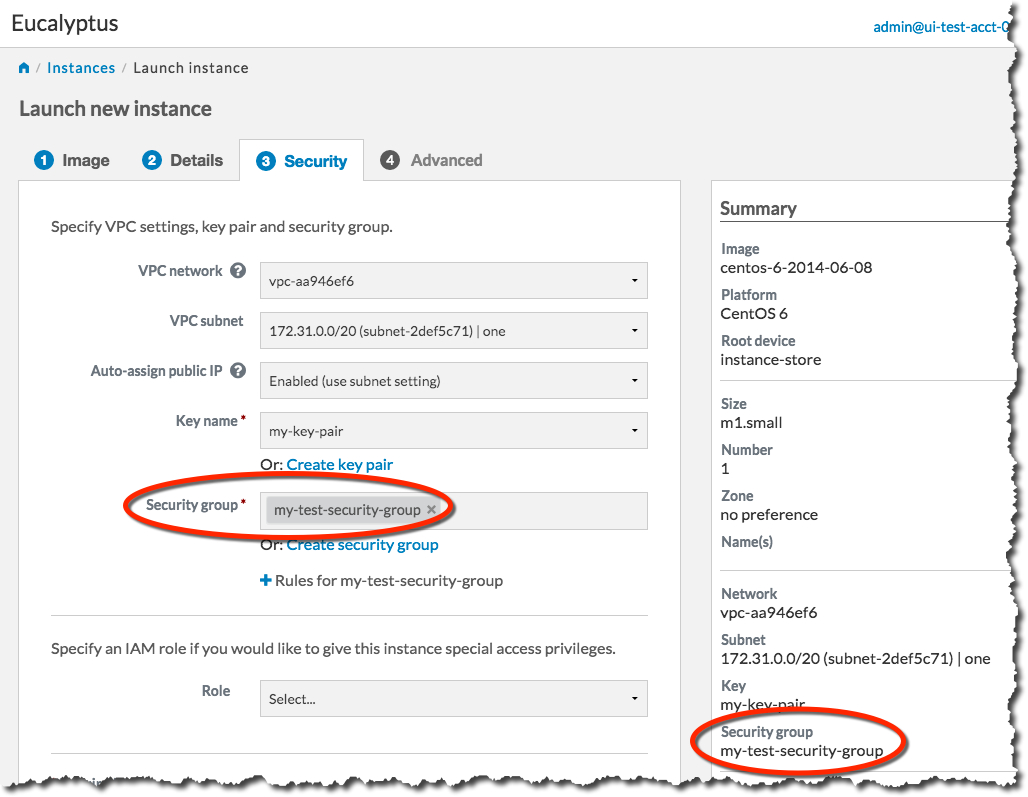
Click the Create security group button. The Create security group dialog will close, and the Security group text box will be populated with the name of the security group you just created:
You’re now ready to launch your new instance. Click the Launch Instance button. The Launch Instance dialog will close, and the Instances screen will display. The instance you just created will display at the top of the list with a status of Pending:

When the status of your new instance changes to Running, click the instance in the list to bring up a page showing details of your instance. For example:
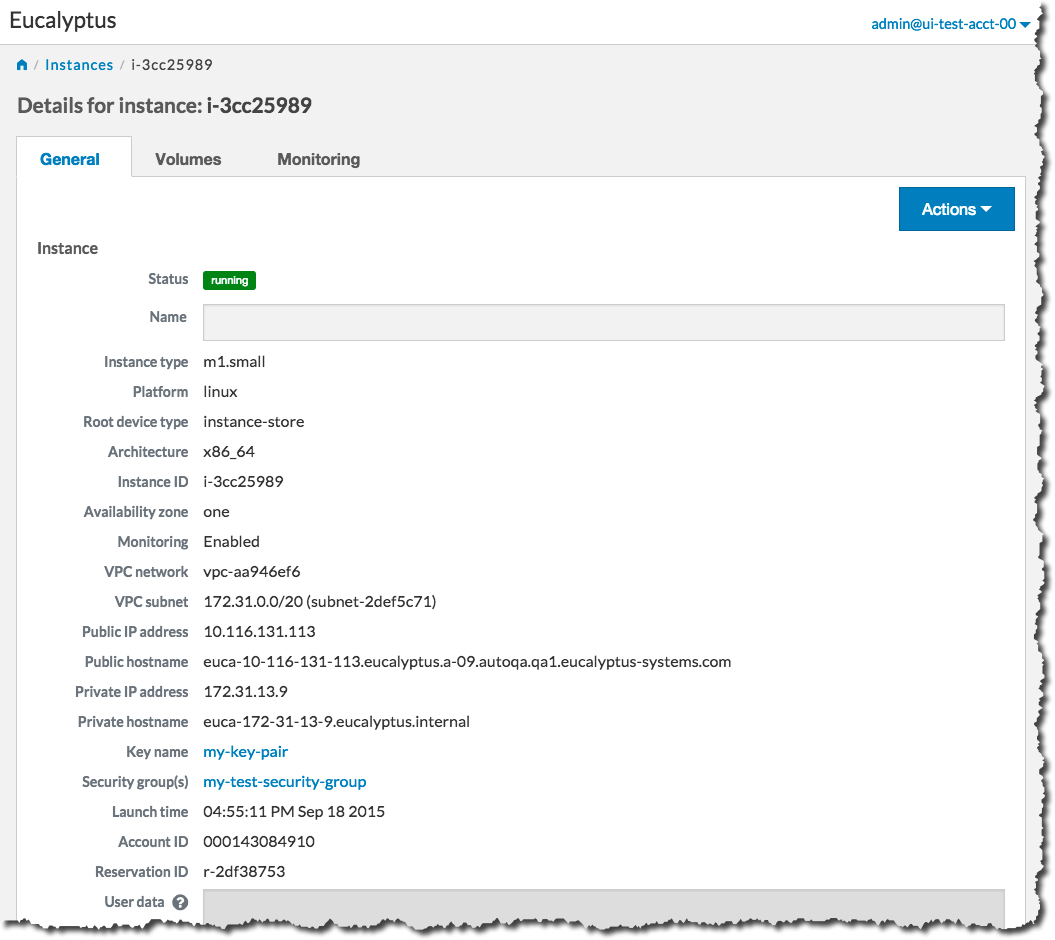
Note the Public IP address and/or the Public hostname fields. You will need this information to connect to your new instance. For example:
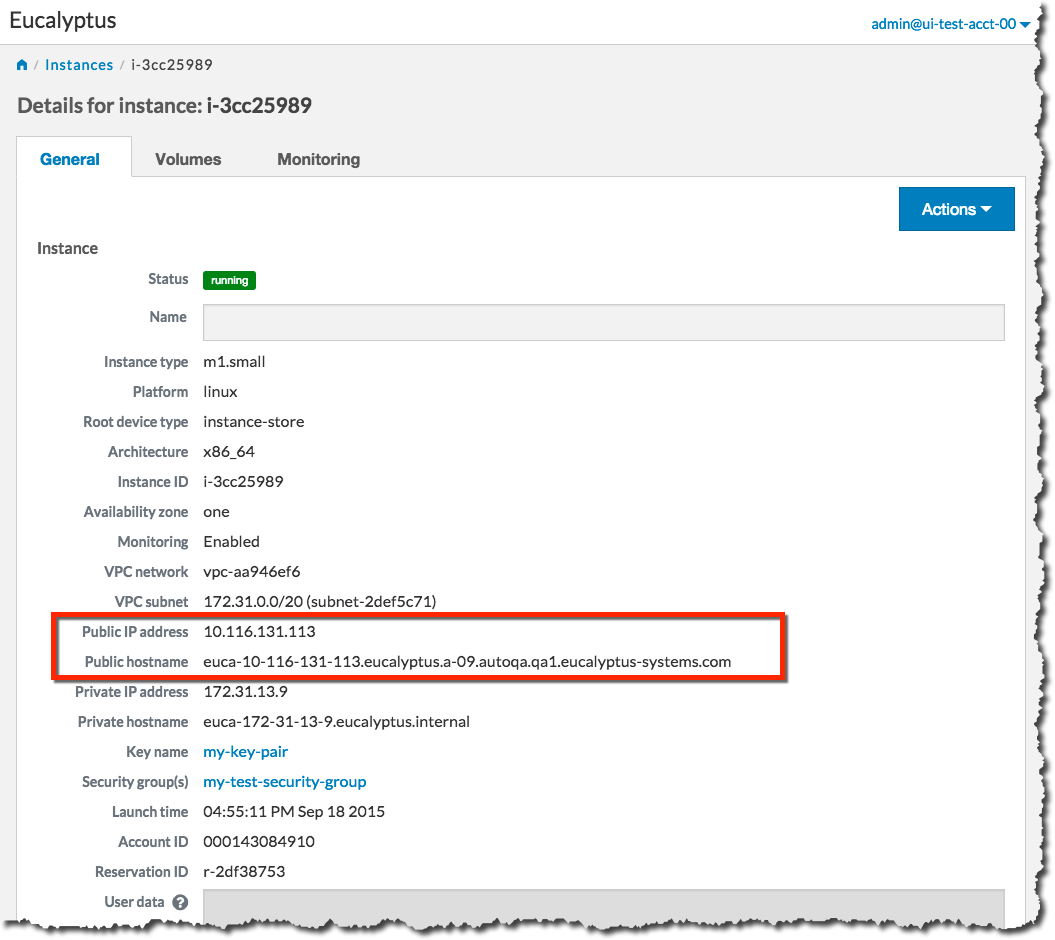
Using the public IP address or hostname of your new instance, you can now use SSH to log into the instance using the private key file you saved when you created a key pair. For example:
ssh -i my-test-keypair.private root@10.111.57.109
3 - Set Up A Web Server on an Instance
Once you’ve launched an instance and connected to it, you can test it by setting up a web server.
ssh into your instance.
ssh 192.168.1.1 -l root
Install Apache:
yum install -y httpd
You should see output similar to the following:
Loaded plugins: fastestmirror, security, versionlock
Loading mirror speeds from cached hostfile
 * extras: centos.sonn.com
centos-7-x86_64-os                                       | 3.7 kB     00:00
centos-7-x86_64-updates                                  | 3.4 kB     00:00
centos-7-x86_64-updates/primary_db                       | 5.4 MB     00:00
epel-7-x86_64                                            | 4.4 kB     00:00
epel-7-x86_64/primary_db                                 | 6.3 MB     00:00
extras                                                   | 3.3 kB     00:00
Setting up Install Process
Package httpd-2.2.15-31.el7.centos.x86_64 already installed and latest version
Nothing to do
Start the web server:
systemctl start httpd.service
You should see output similar to the following:
Starting httpd: [ OK ]
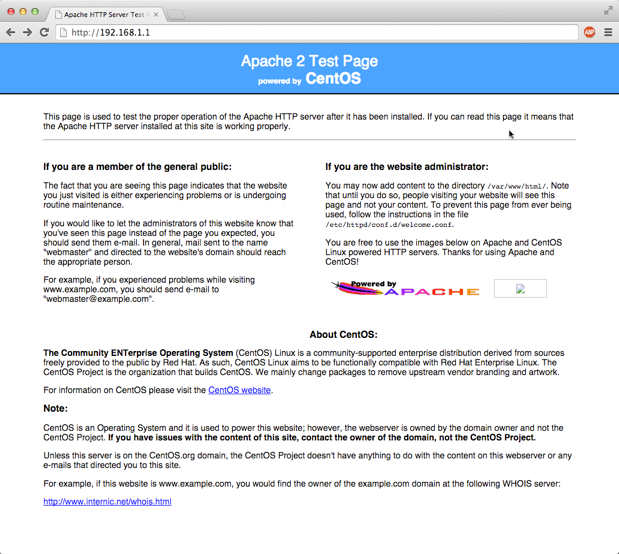
Test connectivity to your instance by using a web browser and connecting to the web service on your instance. For example:
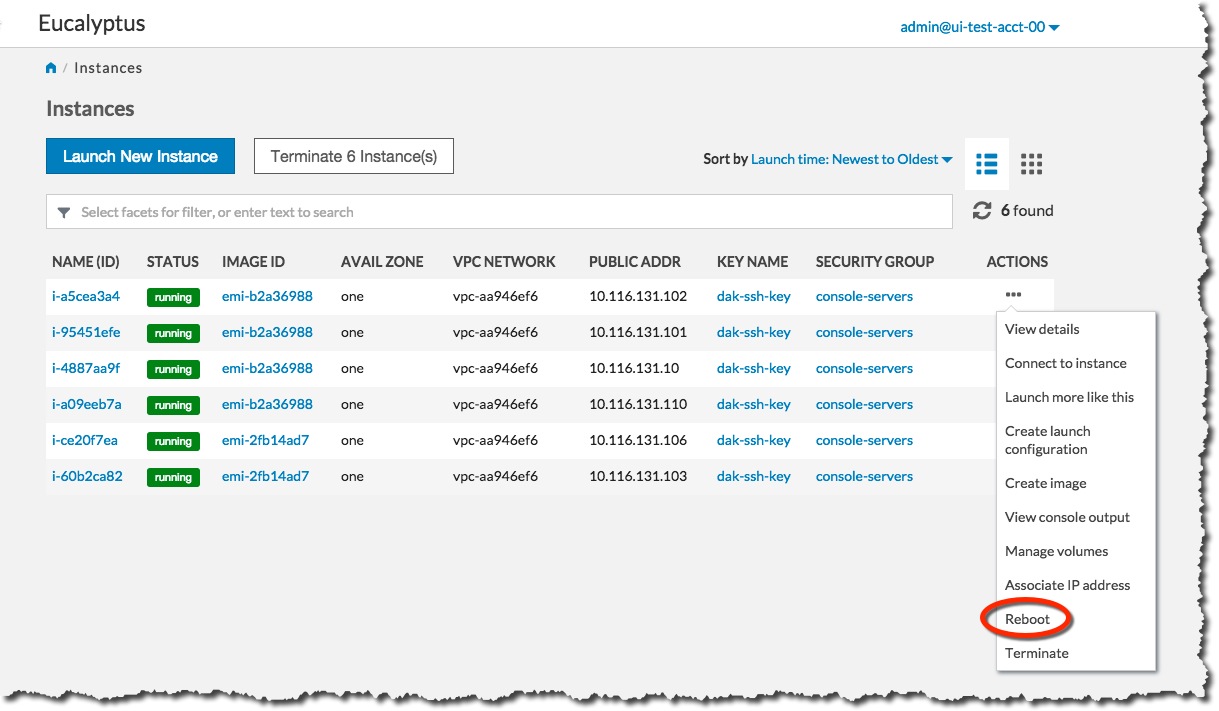
4 - Reboot an Instance with the Management Console
Rebooting preserves the root filesystem of an instance across restarts. To reboot an instance:
On the Instances page, select Reboot from the Actions menu next to the instance you want to reboot.
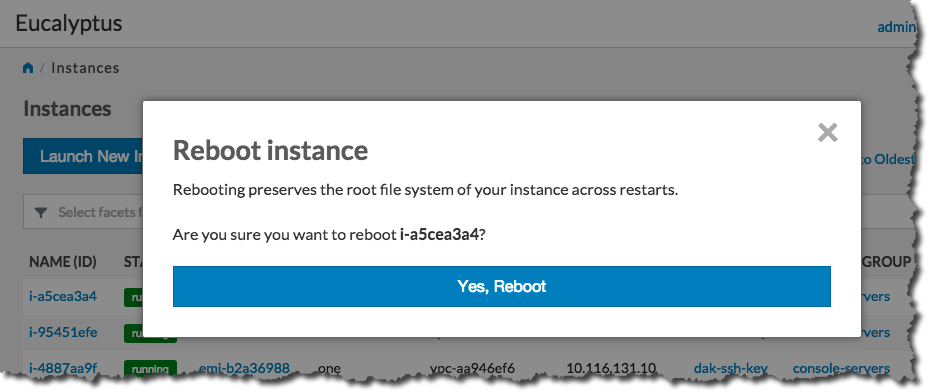
 Click the Yes, Reboot button.
5 - Terminate an Instance with the Management Console
Warning
Terminating an instance can cause the instance and all items associated with the instance (data, packages installed, etc.) to be lost. Be sure to save any important work or data before terminating an instance.To terminate instances:
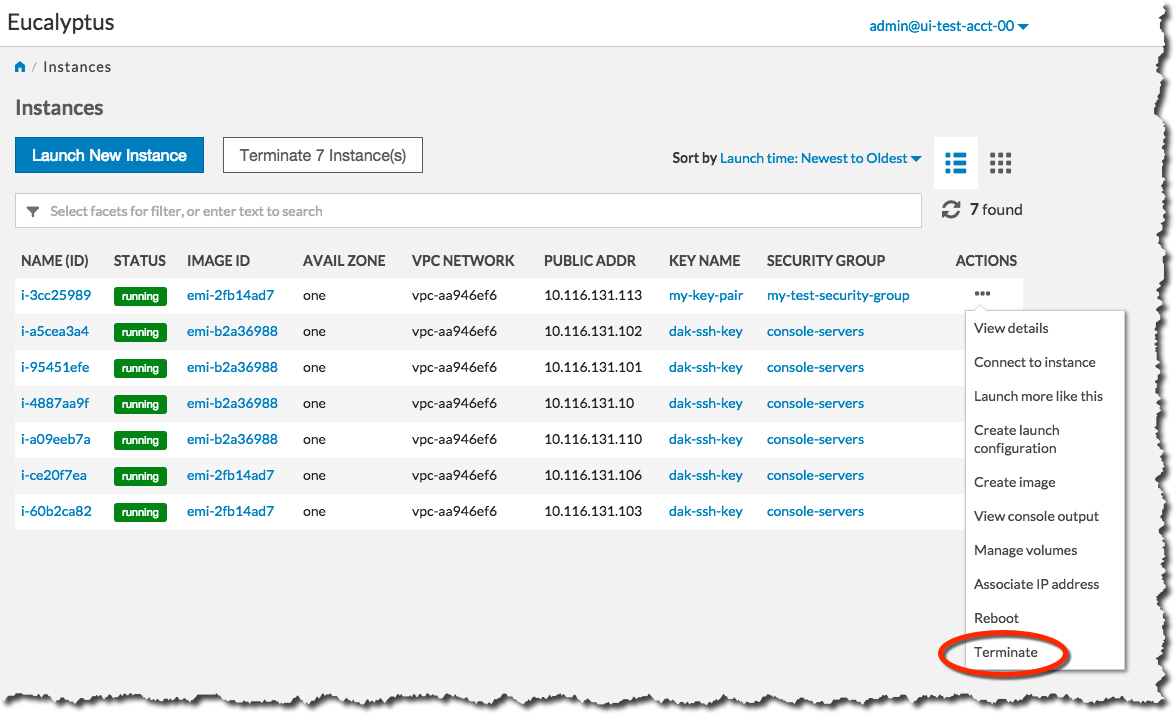
On the Instances page, Select Terminate from the Actions menu next to the instance you want to terminate.
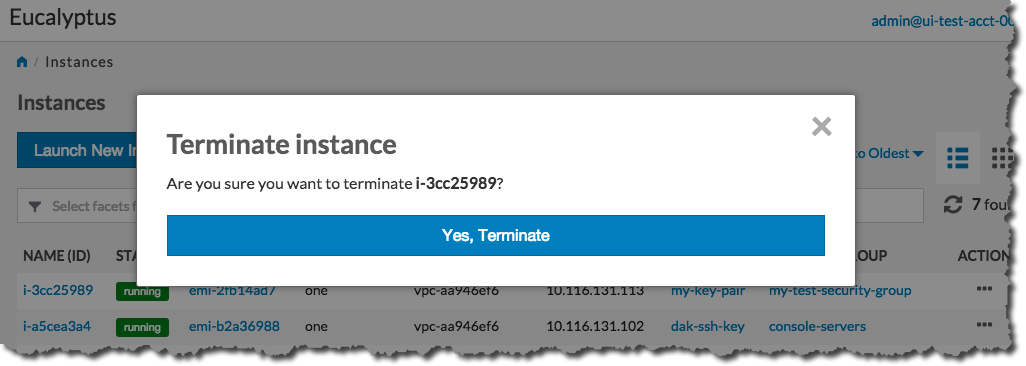
 Click the Yes, Terminate button.
 The Status field of the instance will first change to Shutting-down :
 …and then change to Terminated :
